

By Devin Pettigrew, August 2 2019
Atlatls make excellent tools for public archaeology. I’ve run and assisted with numerous public demonstrations where participants get to use atlatls, and they always seem to draw a crowd. These have been carried out for parks, science camps, universities, archaeological field schools, etc. When executed properly, running demonstrations is fun, although there is definitely an element of work involved. The work is made easier by keeping to some basic guidelines.
Safety
Of course safety is the most important goal. I have never had an injury during an atlatl demonstration, although there have been some close calls. This is partly due to the nature of how the atlatl operates; being projected straight forward by throwing. It is safer for participants to use atlatls than hunting boomerangs, stone slings and even bows. As long as participants maintain a throwing line and enough space between themselves, several people can throw at the same time. Close calls have occurred when participants pull darts from the target and people standing behind them have the nock end of the dart suddenly jabbing towards their face, kids lose focus and run around, people lose their grip on the atlatl and accidentally sling it towards their neighbor in the follow-through, and bad throws result in darts bouncing off of branches from nearby trees and being redirected towards the group (this happened to me once).
Safety is accomplished by having enough help and establishing some range rules. Atlatls are real weapons used in hunting and warfare, and the participants need to understand that. How many helpers are needed depends on the age and number of participants. If you are teaching little kids you will need several helpers; one per two or three children if under 10. If necessary ask parents for help corralling children. Do not allow children under 5 to participate, they lose focus, run and swing around darts, damage equipment, and won’t be able to use atlatls anyway. Young adults and up are much easier to teach and control. They are generally good about following range rules and maintaining equipment, and will help teach their neighbors who are struggling. If participants are age ~20 and up you can get away with one or two instructors per about 20 participants.
Range Rules:
- No running
- Maintain a throwing line–do not throw if someone is in front of you (even to the side but slightly in front of you)
- Keep a few feet of space between yourself and neighboring throwers
- Don’t retrieve darts until all darts have been thrown or the range boss says you can
- Don’t stand behind the target while people are pulling darts
Setting up a range
Choosing the right spot for the demonstration is essential. The throwing range should be marked off with flagging tape along the sides and back if necessary, and should be at least 50 m long (80 m if you are allowing participants to throw for distance). Behind the range should be more open ground with no walkways or buildings, so the total length of the range is at least 100 m. Even skilled users shouldn’t be able to throw regular (not specialized for distance) atlatl darts beyond 70-80 m, but play it safe. How wide you make the range depends on how many participants and instructors you have. If your range is 20 m wide you should have more than one target, and ideally more than one instructor. Leave extra room along the side as well for errant shots.
Maintain a throwing line by watching them closely and giving instructions on where to stand. Stakes or flags can be used on the sides as markers. It is a bad idea to use rope or flagging tape stretched along the ground to mark the throwing line, since people always seem to trip over it.
Soft ground with short mowed grass is gentle on darts and will make retrieving them much easier. You are sure to loose darts in high grass. If you can set your range with a mound of dirt or a hill as the backdrop this is ideal. Finally, avoid having trees in or along side your range within ~20 m of the participants that have low branches, which can catch and redirect darts outside the range or back at the participants.
Targets
These don’t have to be expensive. Personally I prefer to throw at small, 3d, destructible targets like coffee cups, cans and stuffed animals from the thrift store. The latter are especially fun to thwack and hold up better than you might think. Cheap and durable 2d targets can be made by gluing several layers of cardboard together. Cut pieces to a similar size, glue them with elmers or wood glue, and set weight on them over night. Poke holes through the sides so you can tie a string along the back, and set the target against a wooden stake with the string over the stake so it doesn’t fall over. If money is available, 3d foam animal targets made for archery are much more professional, and give participants a better sense of actual use. Check with local archery ranges to see if they have any worn out 3d targets that they will give you or sell for cheap.
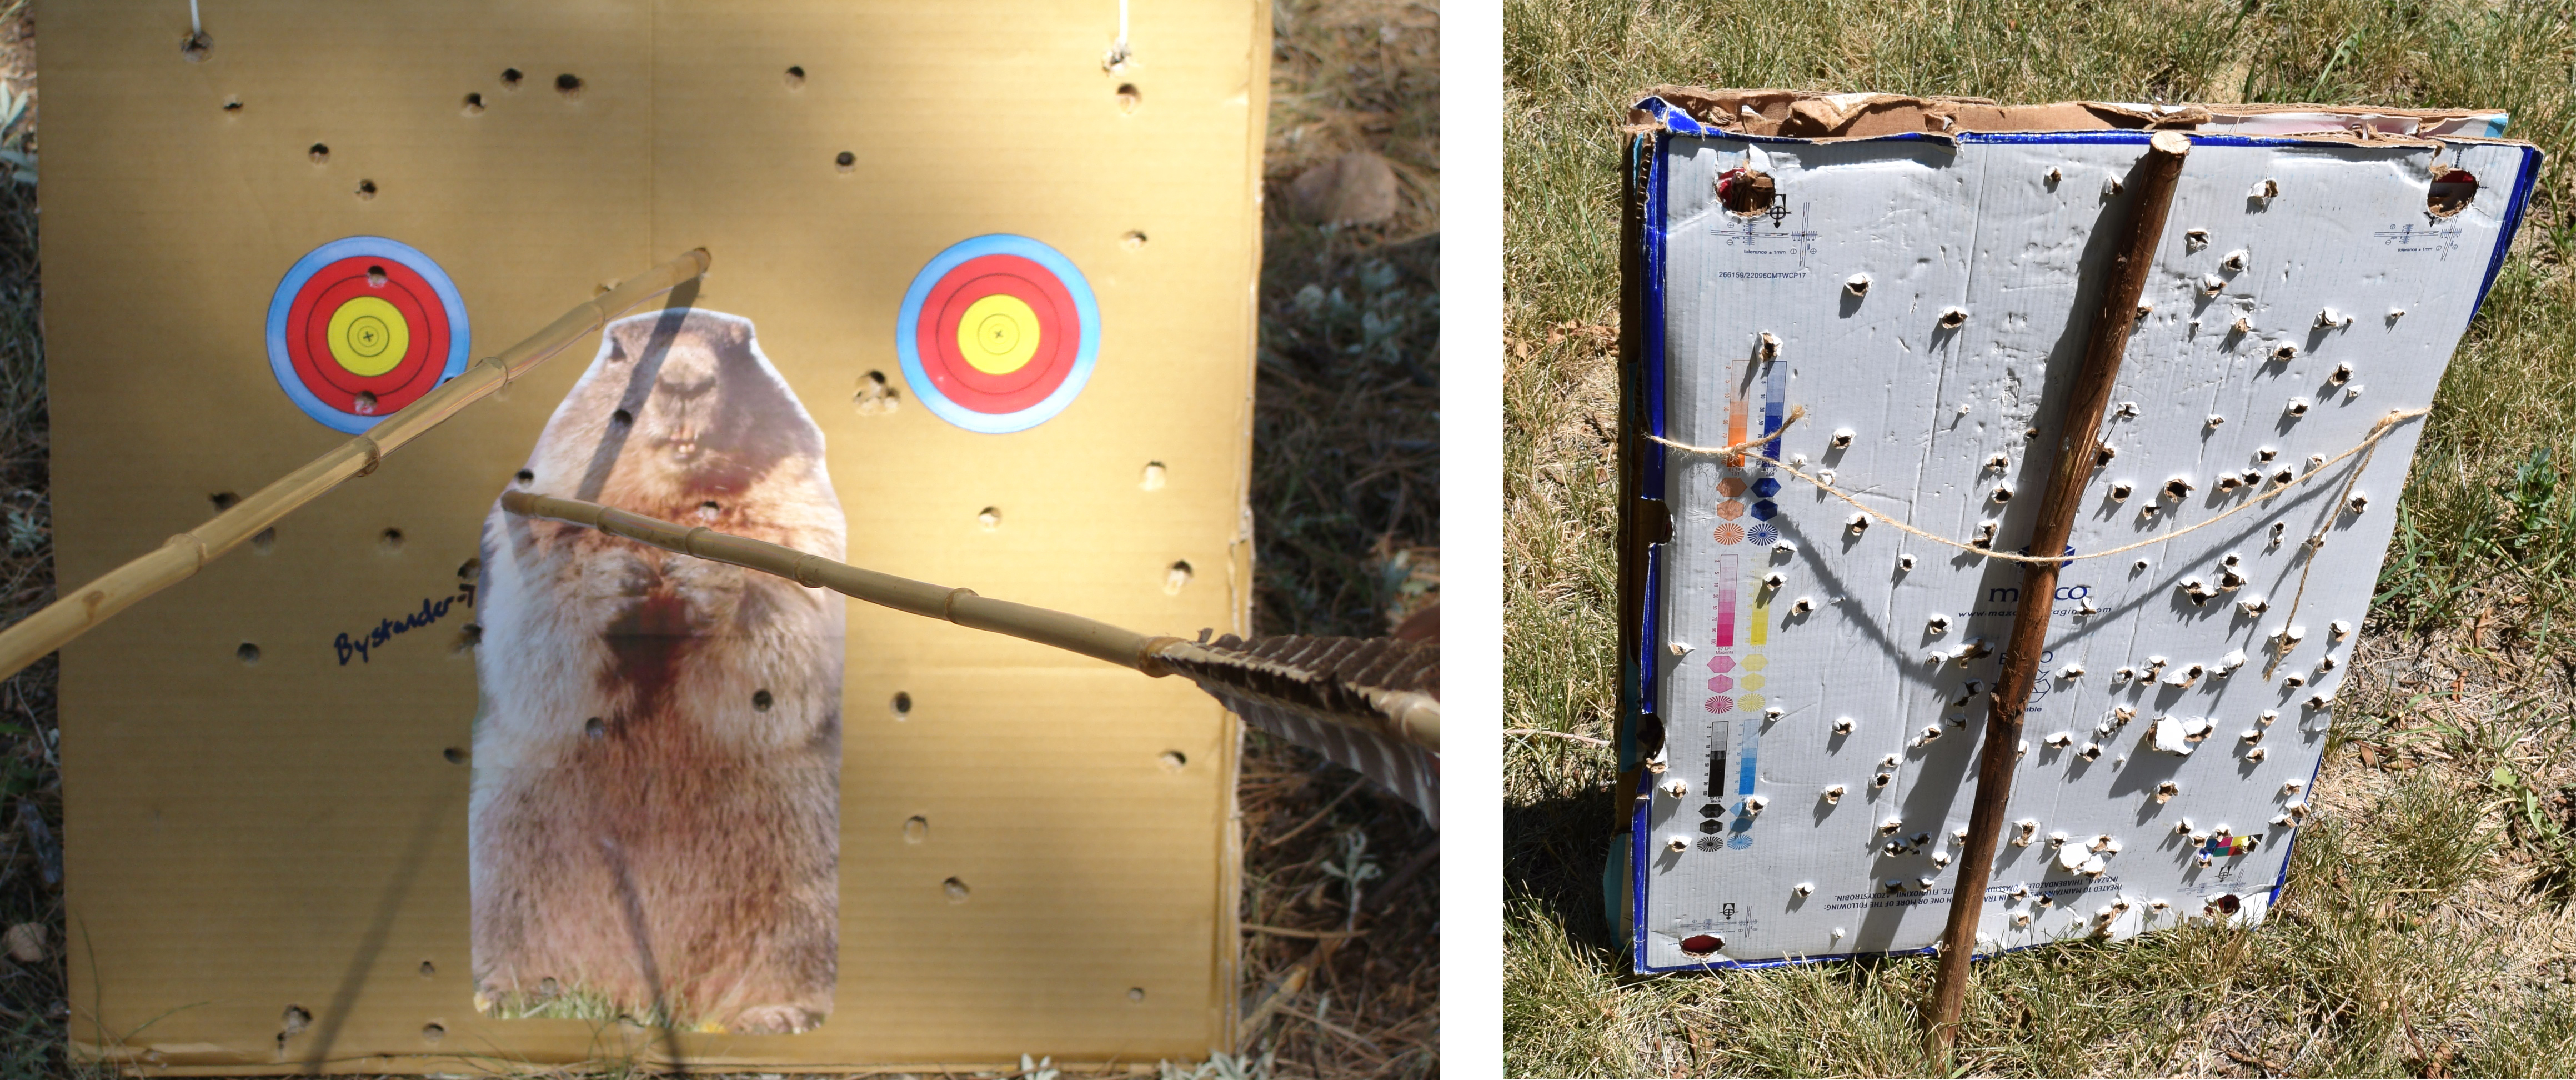
Cheap and durable targets can be made by gluing together multiple pieces of cardboard. Use a blank piece on the front and put whatever design you want on it. My favorite is the nervous ground hog.
What they need to know
When teaching participants, I have developed a general speil that you can hear in the video, “How to Throw” in our videos section. The basic principals to teach them are as follows:
- Maintain a light grip on the dart (very important). It should come up out of your grip as soon as you start to throw. If you do that the dart should exhibit straight flight. Your grip should not wrap over the top of the dart shaft. You are just providing enough backward pressure so it stays on the hook (often poor dart flight or de-hooking in the middle of the throw is the result of a faulty grip–this will be a continuing issue as participants learn).
- The dart flexes, allowing you to make a full throw with a follow-through. You don’t need to stop your hand suddenly part way through.
- Don’t rear back right when you throw, as you would throwing a football. You should be essentially fully cocked back and ready in your aiming position with the dart pointed at the target. If the dart comes up from your grip properly it will fly straight and go where you have it pointed.
- Lastly, use finesse. Don’t try to throw hard until you have mastered the basic principals. Starting out with too much vigor often results in broken darts and throwing atlatls hard into the ground or towards your neighbors.
Some of your participants will have a more difficult time picking it up than others. Much of your time will be spent trying to teach them to grip the atlatl and dart properly.
Be a competent instructor
Atlatls are effective at engaging people. They also give modern folks a better sense of the skill and intelligence of ancient people, but only when participants are shown and allowed to use effective equipment, and the instructors know what they are doing. Far too often museums display atlatls and darts made by someone who has little experience with the tool, and participants are handed poorly made atlatls and darts that are far too stiff (for cheap and easy to construct darts see my video, “How to make simple and affordable Basketmaker darts from dowels”).
Ideally, at least one instructor should be able to demonstrate a moderate degree of skill. The participants and audience will be far more impressed if one instructor can usually hit the target and throw with adequate speed. All instructors present should have the basic knowledge of how to use the types of atlatls available. Finally, at least one instructor should be able to talk about the basic history and application of the weapon.
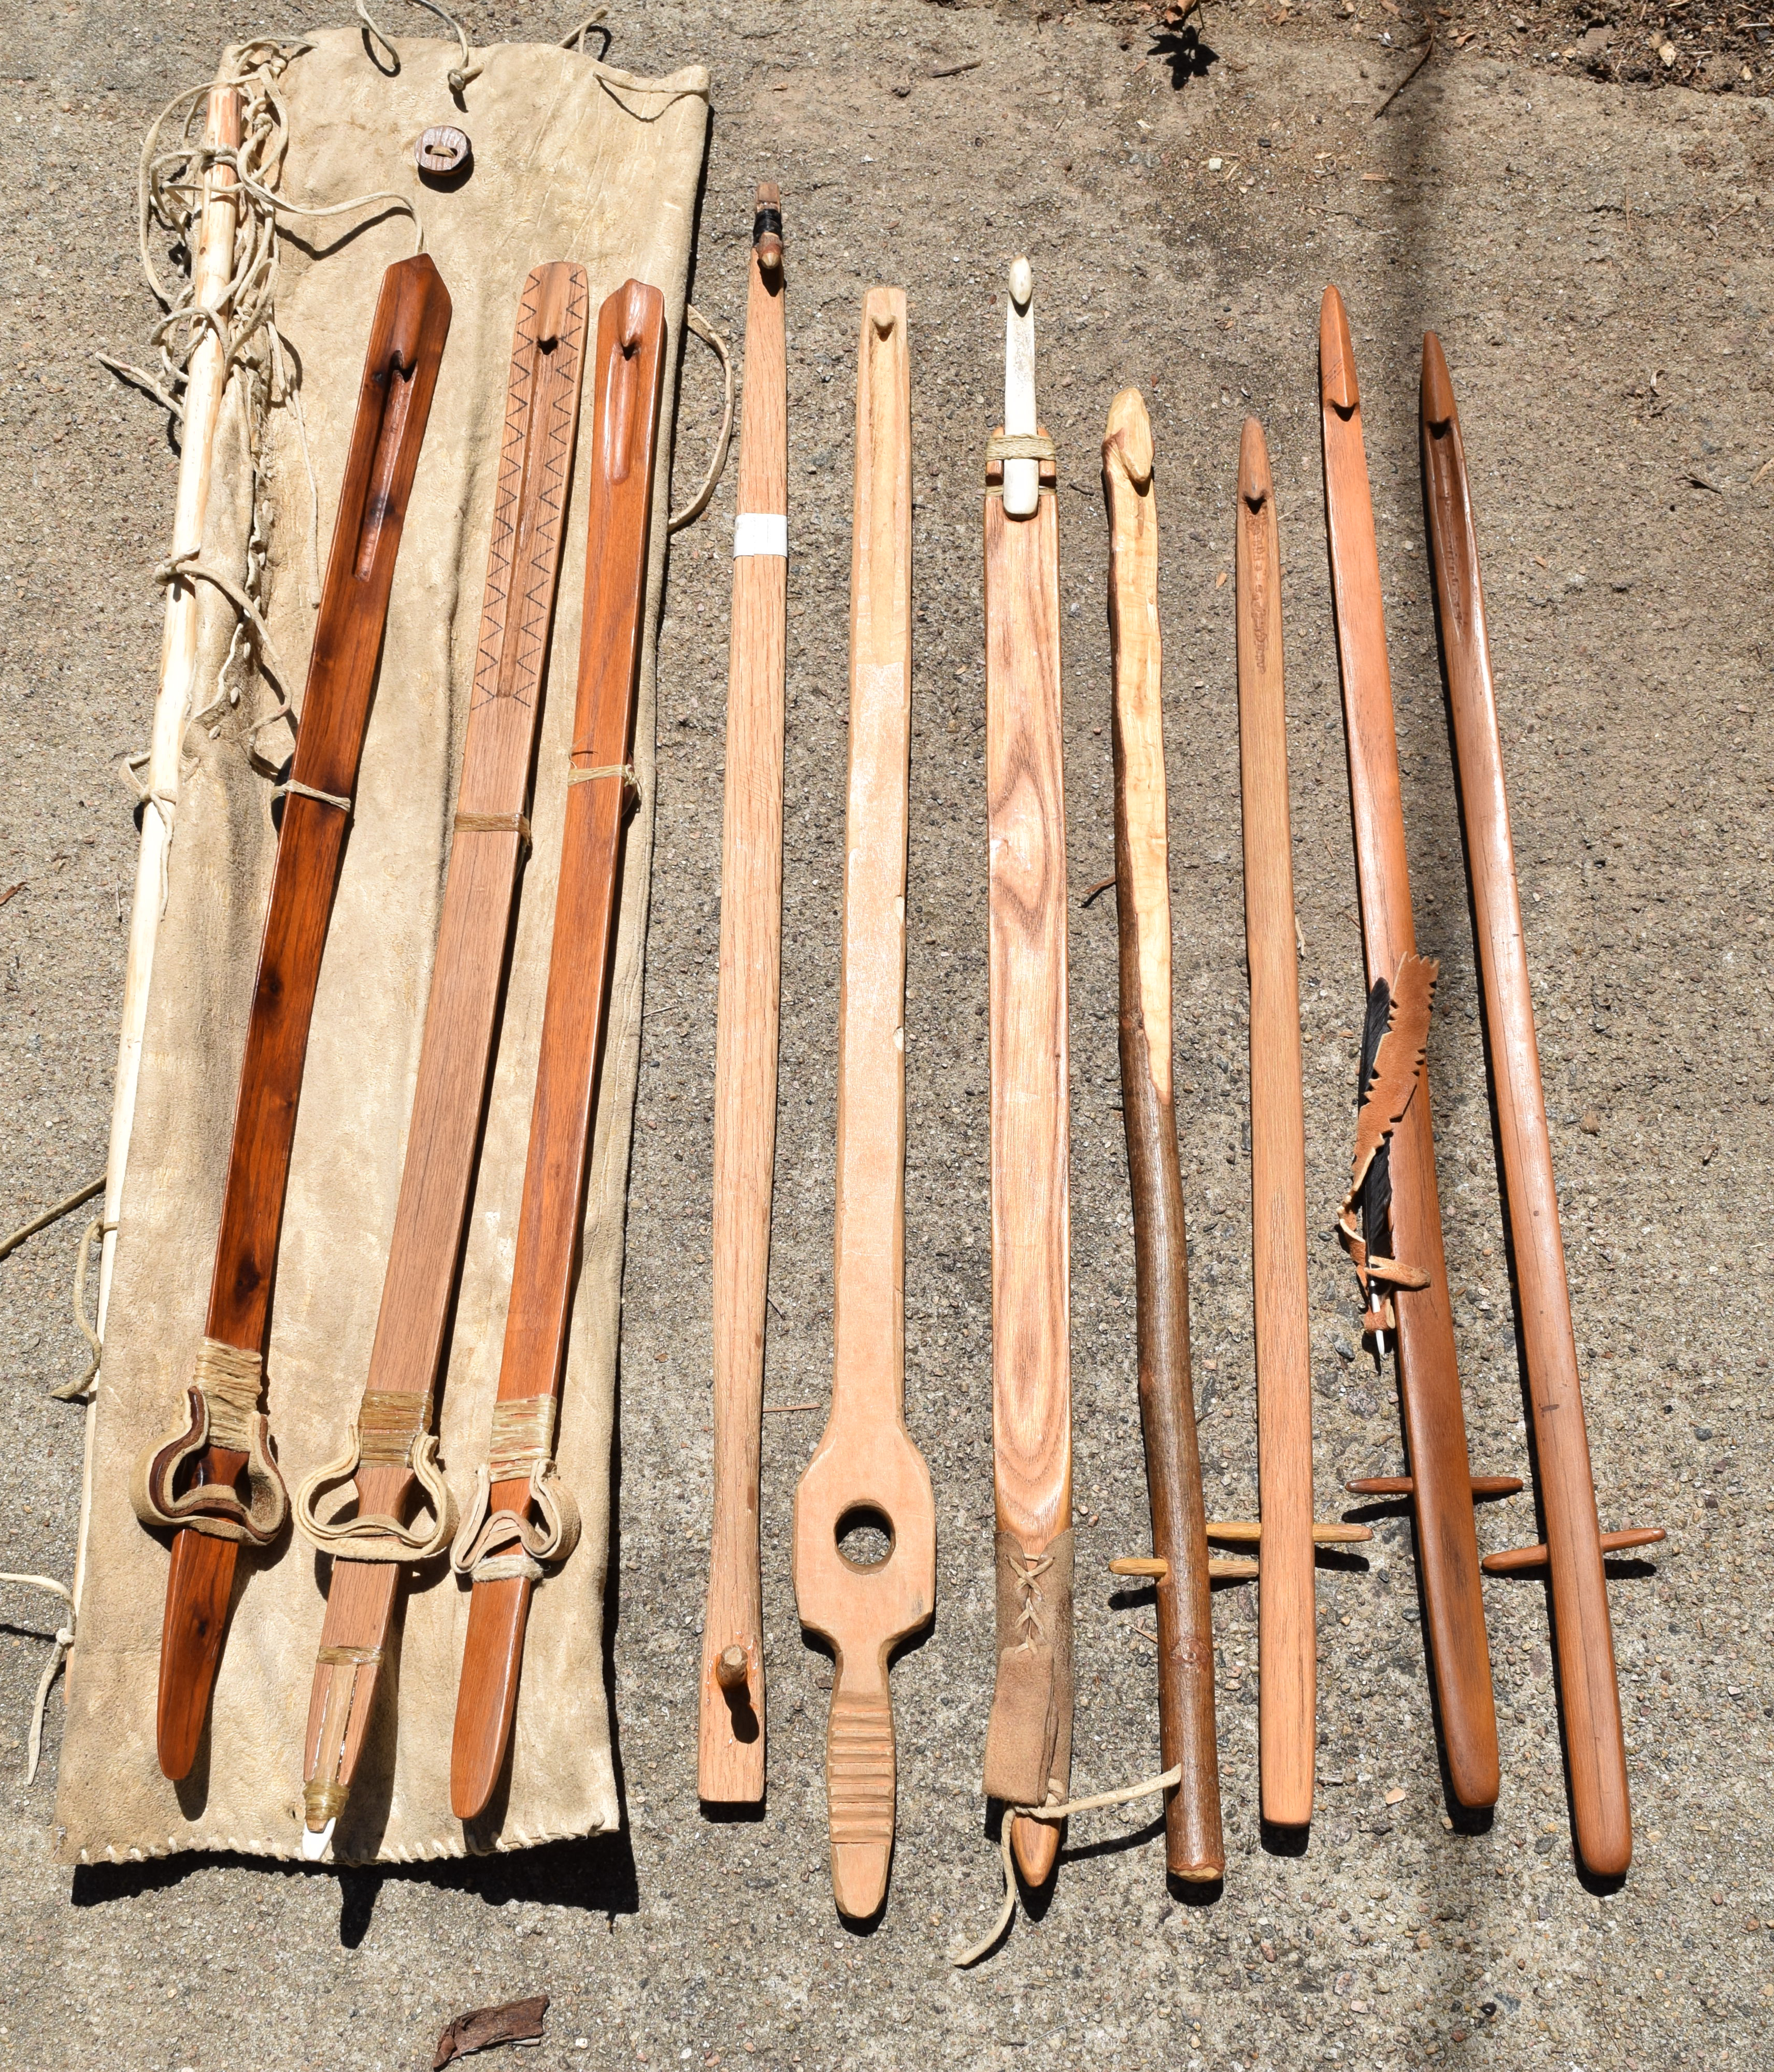
Some atlatls I use for public demos. Most are based on ethnographic or archaeological types. The two in the middle to the right of the bag are by Ray Madden. The cross-peg atlatls on the right are easy to make and stand up to abuse (see the page on the Ozark Bluff-dweller atlatl to find out how to grip them). Note that none of these have dart rests at the end of the handle, as are popular among modern atlatlists. Dart rests are not found archaeologically or ethnographically, so I tend to avoid them, although they do make teaching little kids easier.